

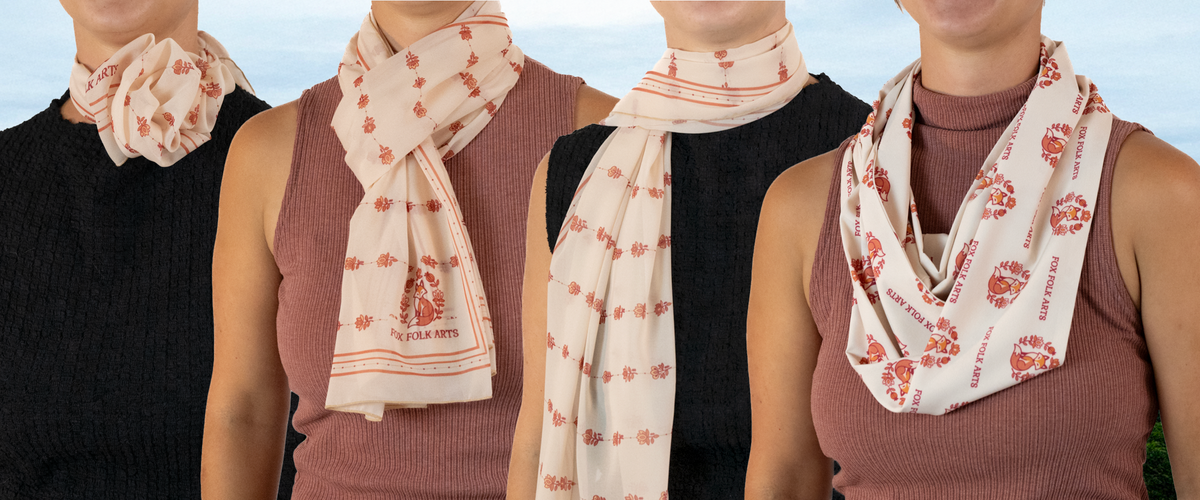
Scarves are having a moment. Lightweight chiffon, silky prints, and classic bandanas are showing up all year as a go-to accessory. People are using scarves to add color, pattern, and personality in new and unexpected ways.
Scarves come in several different shapes and sizes, so there’s no single way to style one. In this blog, we will walk you through our top styling tips for square and rectangle scarves, skinny scarves, and infinity scarves.
Table of Contents
Skinny Scarves (just below)
3 Ways to Tie a Skinny Hair Scarf
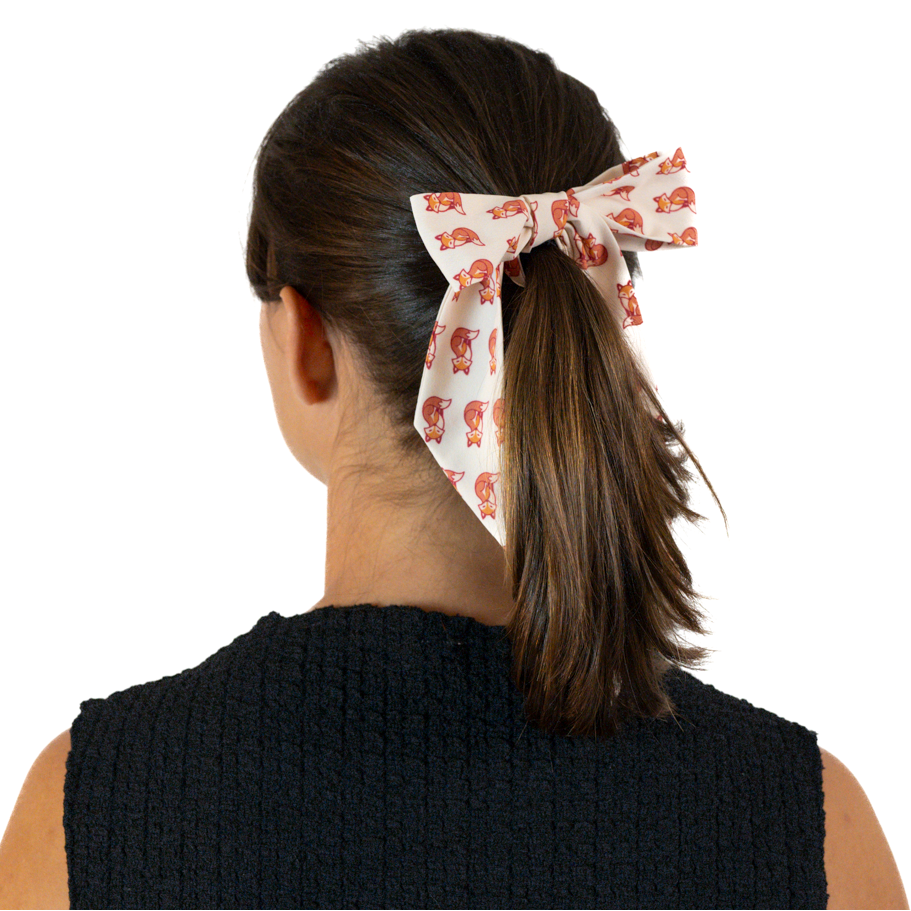
A Hair Scarf, or skinny scarf, is a long, thin scarf with tapered ends that can be styled in a myriad of fun and playful ways. Wear it around your neck, tie it in your hair, or wrap it around your favorite handbag. However you style it, our skinny hair scarf adds a playful, romantic, and chic finishing touch.
Knotty Tie Hair Scarves are 34" x 1.75". We use a high-quality recycled stretch poplin containing 86% recycled polyester and 14% spandex. Our hair scarves feature a double-sided design with tapered ends, so they look great from every angle.
Choose from over 700 patterns and customize any design in the exact colors you want, right on our website. If you want something completely unique, upload your own artwork, or work with our in-house graphic designers to create a custom hair scarf just for you.
The most common way to wear a skinny hair scarf is tied around a ponytail in a simple knot or bow. It's sweet and easy, but this little scarf can do so much more. Below are a few of our favorite ways to style it, from your neckline to your handbag.

The Simple Tie
The Simple Tie is a quick, easy way to add a pop of color or pattern to any outfit. It gives you a clean, polished knot that sits comfortably around your neck and slides up or down so you can set it exactly where you like.
Our skinny hair scarf is already narrow and double-sided, so there's no folding needed. Just drape, tie, and go. It pairs perfectly with a crew neck tee, button-up, blouse, or dress, and the tapered ends hang neatly for a finished look.
How To Tie A Skinny Scarf Around Your Neck:

Step 1: Drape around your neck
Place the middle of the hair scarf behind your neck, with the two tails draping over your shoulders and hanging down the front.

Step 2: Make one side longer
Adjust the tails so the left side hangs slightly longer than the right side.

Step 3: Tie a loose knot on the longer side
With your left hand, place two fingers on top of the left tail, where you want the knot to sit. With your right hand, bring the left tail up and over your two fingers, toward the outside edge (toward your left arm). Wrap it behind the draped scarf and bring it back around. Then pass the end into the loop around your fingers, and pull it through and down. Keep the knot loose, because you're not done with it yet! Gently adjust the knot until it looks clean and even.

Step 4: Thread the shorter tail through the knot
Take the shorter tail (the right side) and slip it through the top of the knot and out the bottom.

Step 5: Center the knot and even out the tails
Pull down on the tail you just threaded until both tails are even and the knot sits centered at the front of your neck. For fine adjustments, hold both tails in one hand and slide or shape the knot with the other until it sits at the exact placement you want.

Finished look
The finished Simple Tie looks polished and stays in place all day, and it's easy to loosen or move whenever you like.
The Headband
The Headband is an easy, stylish way to keep hair out of your face or dress up an outfit. It's quick to tie, comfortable to wear all day, and works with your hair up or down, long or short, with or without bangs.
Our skinny hair scarf is double-sided with tapered ends, so it looks finished from every angle, whether the knot sits at the back of your neck or on top of your head.
How To Wear A Skinny Scarf In Your Hair As A Headband:
Before you begin: You can wear this style with your hair up or down. If it's easier, pull your hair back first so you don't catch any strands in the knot. If you have bangs and want them to show in front of the headband, leave them out and style them the way you'd like them to sit.

Step 1: Place the scarf on your head
Place the middle of the hair scarf at the crown of your head, with the two tails hanging down on either side.

Step 2: Tie behind your neck
Bring both tails behind your head and tie them in a snug double knot at the nape of your neck, underneath your hair, to secure the headband.

Step 3: Adjust and style
Slide the headband forward or back until it sits where you like. If you pulled your hair back, let it down, then adjust your bangs and pull a few strands forward to frame your face.

Finished look
The finished Headband looks polished and effortless, and it keeps your hair in place all day.

Try it the other way
For a retro twist, start with the middle of the scarf behind your neck, under your hair. Bring both tails up and tie them in a double knot on top of your head, just off to the side.
The Purse Scarf
Wrapping a skinny scarf around a handbag handle is one of the easiest ways to refresh a bag you already own and add a pop of color or pattern. It also helps protect your handle from everyday wear.
This wrap works best on handbags with shorter handles. On a longer handle or shoulder strap, the skinny scarf may not cover the full length. You can always simply tie your skinny hair scarf in a bow around your purse handle for a quick, playful look. A bow also works great for attaching your favorite bag charms.
How To Tie A Scarf On A Bag Handle:

Step 1: Center the scarf on the handle
Find the center of one of your handbag handles. Drape the middle of your hair scarf over the top of the handle so both ends hang down evenly on either side.

Step 2: Wrap the left side
Starting with the left tail, wrap the scarf around the handle, working toward the left end of the handle. Follow the direction the tail is already hanging. If the tail hangs behind the handle, bring it forward, under the handle, then back up and over. If it hangs in front, bring it under and behind, then over and forward. Keep the fabric straight and smooth as you go.
Keep wrapping until you have about two inches of tail left.

Pro Tip:
Space your wraps so each one only slightly overlaps the last. Covering too much of the previous wrap uses up fabric quickly, and you'll want enough tail left at the end for a cute, even finish.

Step 3: Tie off the left side
Hold the two-inch tail in one hand. With your other hand, loosen the last wrap to create a little space, then pull the tail through the front once and pull it tight to secure. The tail should point down when you're done. Adjust the wrap so it covers the handle evenly.

Step 4: Repeat on the right side
Repeat Steps 2 and 3 with the right tail, wrapping tightly toward the right end of the handle and tying it off the same way. Make your wraps the same size as on the left side so both tails end up the same length.

Finished look
The finished Purse Scarf gives any bag a polished, custom look in just a few minutes.
3 Ways to Tie a Square Scarf
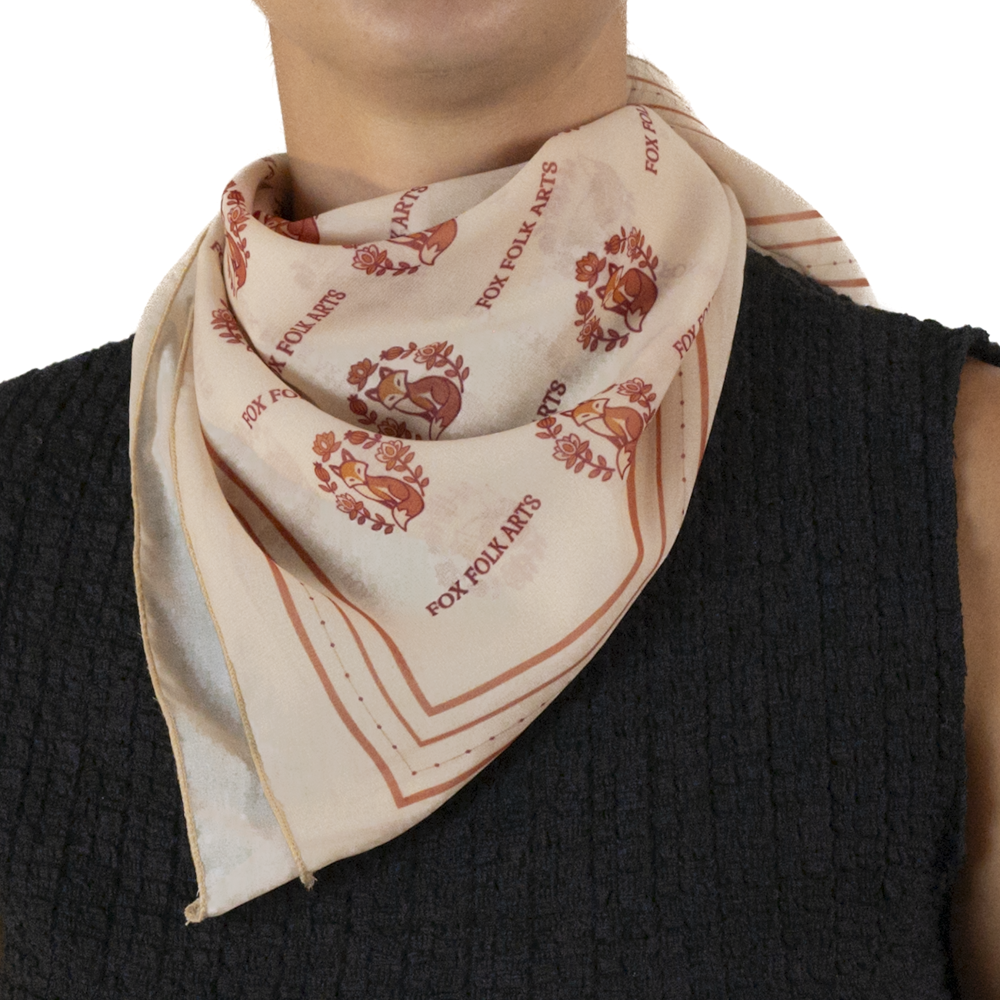
Square scarves are a versatile and simple way to add a pop of color, interest, or fun neckline to any outfit. Square scarves are easy to fold, roll, tie, and adjust, and can easily look either playful or polished.
Knotty Tie Square Scarves are 27" x 27". We use a lightweight and sheer recycled chiffon fabric. Chiffon scarves are printed on a single side, with finely finished thread wrapped edges, and have a silk-like feel and drape.
Every Knotty Tie Square Scarf is custom made for you! Upload your own design, logo, or artwork, or work with our in-house graphic designers to create a one-of-a-kind design printed in your exact colors.
The most common way to wear a square scarf is folded into a triangle, with the tip draping down the front and the ends tied behind your neck. It's a classic for a reason, but there are so many unique ways to elevate your style. Below are a few of our favorites.

The Adjustable Knot
The Adjustable Knot is so simple, but so pretty. It gives you a clean, polished knot that sits comfortably around your neck. The knot slides up or down, so you can set it exactly where you like and adjust it throughout the day.
This style works with any neckline, from a crew neck tee or button-up to a turtleneck or dress. It's one of the easiest ways to wear a square scarf. It's also a go-to for team uniforms and business-casual dress codes, and it's the style many people refer to as the flight attendant tie. It works just as well for men as a modern neckerchief.
How To Tie An Adjustable Knot Square Scarf:

Step 1: Fold into a triangle
Fold your square scarf into a triangle by bringing the two opposite corners together. Keep the vibrant, printed side facing out.

Step 2: Fold into a long band
Starting at the point of the triangle, fold or roll the fabric down toward the long edge. Keep each fold about 1–2 inches wide, depending on how wide you'd like your finished scarf to be. Keep folding until the entire scarf is a long, flat strip.

Pro tip:
Keep your folds the same width from start to finish. Even folds give you a smooth, flat band that ties cleanly and lies nicely against your neck.

Step 3: Drape around your neck
Place the middle of the band behind your neck, with the two tails draping over your shoulders and hanging down the front.

Step 4: Make one side longer
Adjust the tails so the left side hangs slightly longer than the right side.

Step 5: Tie a loose knot on the longer side
With your left hand, place two fingers on top of the left tail, where you want the knot to sit. With your right hand, bring the left tail up and over your two fingers, toward the outside edge (toward your left arm). Wrap it behind the draped scarf and bring it back around. Then pass the end into the loop around your fingers, and pull it through and down.
Keep the knot loose, because you're not done with it yet! Tying it this way keeps the knot from getting tight, and leaves the tail pointing the right direction. Gently adjust the knot until it looks clean and even.

Step 6: Thread the shorter tail through the knot
Take the shorter tail (the right side) and slip it through the top of the knot and out the bottom.

Step 7: Center the knot and even out the tails
Pull down on the tail you just threaded until both tails are even and the knot sits centered at the front of your neck. For fine adjustments, hold both tails in one hand and slide or shape the knot with the other until it sits at the exact placement you want.

Finished look
The finished Adjustable Knot looks polished and stays in place all day, and it's easy to loosen or move whenever you like.
The Headscarf
The Headscarf is a timeless way to wear a square scarf on your head. It's breezy, fun, and functional, keeping your hair out of your face while adding a pop of color and pattern to any outfit. Wear it to brunch, to the beach, on a road trip, or on any day your hair needs a little help.
This style works with long or short hair, with or without bangs, so it's an easy way to wear a scarf fashionably on your head.
How To Tie A Square Scarf Headscarf:
Before you begin: Pull your hair back and out of the way. For longer hair, a ponytail or claw clip works best. If you have bangs and want them to show in front of the headscarf, leave them out and style them the way you'd like them to sit.

Step 1: Fold into a triangle
Fold your square scarf into a triangle by bringing the two opposite corners together. Keep the vibrant, printed side facing out.

Step 2: Adjust the coverage (optional)
If you'd like to adjust the length of the headscarf, roll the long edge under to shorten the triangle.

Step 3: Place the scarf on your head
Flip the triangle over your head so the long, folded edge sits on the crown of your head and the point of the triangle drapes down the back of your head.

Step 4: Tie behind your neck
Bring the two side corners behind your neck, underneath the point of the triangle. Tie them in a snug double knot so it won't come undone. Leave the point hanging loose over the knot.

Step 5: Style and finish
If you pulled your hair back, take out your hair tie or claw clip, and let your hair fall out from under the headscarf, between the knot and the point. Adjust your bangs, and pull a few strands forward along the edges of your face to frame it.

Finished look
The finished Headscarf looks effortlessly put-together and stays in place all day.
The Scarf Rose
The Scarf Rose turns a simple square scarf into a statement piece. With just one knot and a quick twist, the fabric gathers into a soft rosette that sits right at the front of your neck. It's a showstopping way to finish a simple dress, blouse, or neutral top, and it looks especially stunning in a bold, vibrant print.
It takes a little practice, but once it clicks, it feels like magic. If you don't love your rose the first time, simply untie it and try again! Every rose turns out a little different, and that's part of the charm.
How To Tie A Square Scarf Into A Rose:

Step 1: Fold into a triangle
Fold your square scarf into a triangle by bringing the two opposite corners together. Keep the vibrant, printed side facing out.

Step 2: Tie a small knot at the tip
At the tip of the triangle, tie the two layered corners together in a very small, secure double knot. Tie it as close to the ends as possible so the knot stays tiny and hides easily behind the finished rose. Your scarf will still be a triangle, but now it forms a loop.

Step 3: Slip the scarf onto your left wrist
Slide your left hand through the loop, between the two layers of fabric, so the small knot rests on the back of your left wrist. The two remaining corners now point out to either side, with one corner near your hand and the other near your elbow.

Step 4: Bring the first corner to your left hand
With your right hand, grab the closest corner and bring it up so your left hand can hold it.

Step 5: Pull the second corner through the loop
Take your right hand and reach through the loop, toward your elbow, and grab the corner near your elbow. Pull it straight back out the way you came. You should now be holding one corner in each hand.

Step 6: Swap hands to twist
Twist the ends with a single swap by switching which corner each hand is holding. Pass the corner in your right hand around the outside to your left hand, and pass the corner in your left hand through the inside to your right hand. This creates a half rotation.

Pro tip:
With our lightweight chiffon, one twist gives the cleanest rose. More twists (two at most) can make the fabric catch as you pull, leaving the rose looking too fluffy. Different fabrics behave differently, so feel free to experiment with other scarves.

Step 7: Pull to form the rose
Pull firmly in opposite directions, drawing your left hand back out through the loop as you go. The folds and twists tighten together into a pretty rose.

Step 8: Shape and wear
Gently fluff the fabric petals to shape your rose. Place the rose at the front of your neck, wrap the two tails around to the back, and tie them securely behind your neck.
Using a larger square scarf? Wrap the tails behind your neck and back to the front, then tie a simple knot so the tails drape beside the rose.

Finished look
The finished Scarf Rose is an elegant, eye-catching look that's sure to get compliments.
3 Ways to Tie a Rectangle Scarf
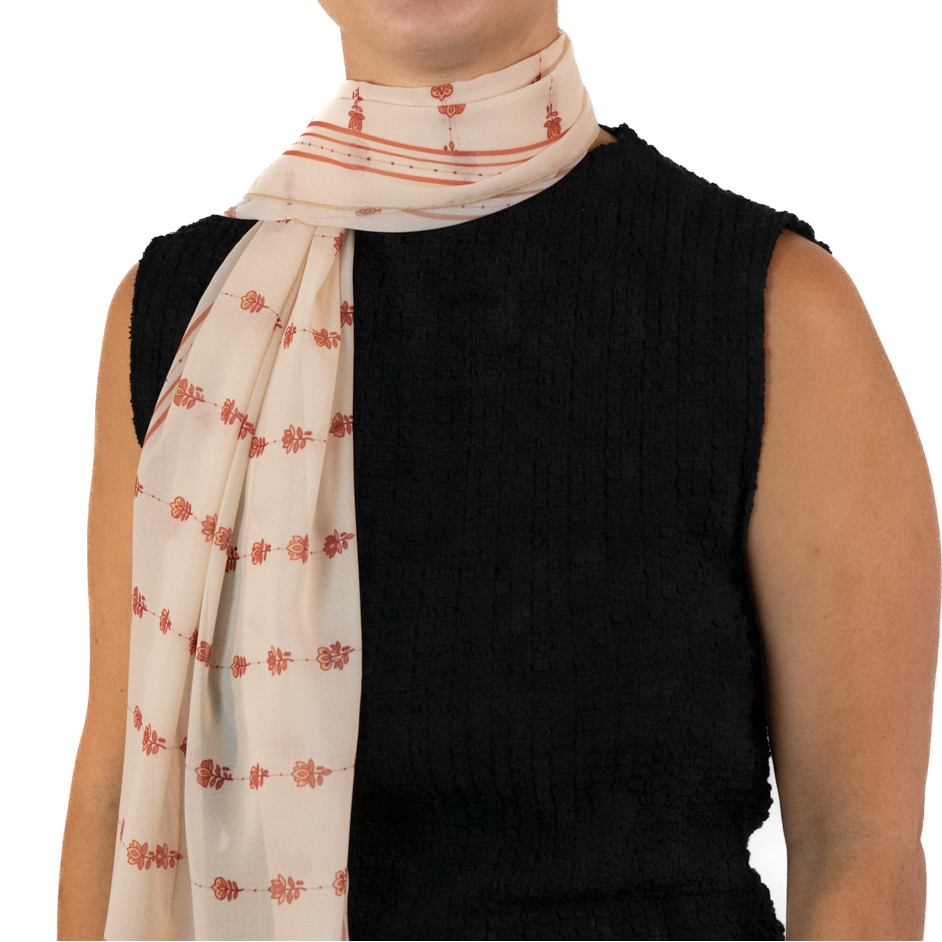
Rectangle scarves are a flowy and elegant way to add flair, texture, and dimension to any outfit. Rectangle scarves are great for casual or more formal settings. With more length to work with than a square scarf, rectangle scarves can be looped, knotted, draped, and wrapped into styles that range from effortless to eye-catching.
Knotty Tie Rectangle Scarves come in three sizes: small (54" x 12"), medium (60" x 18"), and large (72" x 24"). We use a lightweight and sheer recycled chiffon fabric. Chiffon scarves are printed on a single side, with finely finished thread wrapped edges, and have a silk-like feel and drape. We offer three sizes so you can choose the fit, drape, and style that works best for you. The small and medium sizes are perfect for simple knots and lighter layering, while the large rectangle scarf looks fuller and provides the most drape for more dramatic styles.
Every Knotty Tie Rectangle Scarf is custom made for you! Upload your own design, logo, or artwork, or work with our in-house graphic designers to create a one-of-a-kind design printed in your exact colors.
The most common way to wear a rectangle scarf is simply draped around your neck, with both ends hanging down the front, or one end tossed over your shoulder. It's an easy, go-to look, but with just a few twists and loops, you can take it so much further. Below are a few of our favorites, along with the scarf size we recommend for each.

The European Loop
The European Loop, also known as the Parisian Knot, is one of the quickest and most popular ways to tie a rectangle scarf around your neck. It takes just seconds, stays neatly in place, and gives you a polished, French-inspired look without any complicated knots.
This style pairs well with everything from a blouse or sweater to a blazer or jacket, which makes it an easy go-to for the office or the weekend. It's also a classic for men, and it works with every size of our rectangle scarves.
How To Tie A Rectangle Scarf In A European Loop:

Step 1: Fold in half
Fold your rectangle scarf in half by bringing the two ends together, with the vibrant, printed side facing out. You'll now have a loop at one end and two loose tails at the other.

Pro tip:
For a slimmer, neater look, fold, or bunch the scarf lengthwise first (long edge to long edge) before folding it end to end. This works especially well with our medium and large scarves.

Step 2: Drape around your neck
Place the folded scarf behind your neck, with the loop hanging down the front on your left side and the two loose tails hanging down the front on your right side.

Step 3: Pull the tails through the loop
Take both loose tails and pull them through the loop.

Step 4: Adjust
Gently pull the tails to tighten the loop until it sits comfortably at your neck, then adjust the fabric so it lies smoothly. Wear it snug and close to your neck for a polished look, or keep it loose and low for a more relaxed style.

Finished look
The finished European Loop looks effortlessly put-together and is perfect for everyday wear.
The Threaded Knot
Don't let the intermediate label fool you. The Threaded Knot is surprisingly easy and looks far more complex than it is! It works beautifully with every size of our rectangle scarves.
Wear it centered or to the side for a polished, professional look. It's an easy way to dress up a simple sweater, blouse, or dress.
How To Tie A Rectangle Scarf in a The Threaded Knot:

Step 1: Gather the scarf
Bunch the fabric together lengthwise, or fold it into a narrow band to make it as skinny as you’d like.

Step 2: Tie a knot in the middle
Find the middle of your scarf and tie a simple knot. Not too tight but not too loose, so you'll have a little wiggle room later.

Step 3: Place the knot and wrap
Place the knot against the front of your neck. Make sure it’s centered for now. Wrap both tails around the back of your neck and bring them back to the front so they drape forward.

Step 4: Pull the first tail through the knot
Slide a few fingers into the left side of the knot, grab the right tail, and pull it through the knot to the left side.

Step 5: Pull the second tail through the knot
Slide your fingers into the right side of the knot, grab the left tail, and pull it through the knot to the right side. Each tail should now come out on the opposite side from where it started.

Step 6: Adjust and style
Shape the knot until it looks clean, then adjust its placement. Wear it as is, or slide the knot to one side and toss one tail over your shoulder for a more effortless look.

Finished look
The finished Threaded Knot looks polished and intentional, but takes just a minute to tie.
The Fitted Twist
The Fitted Twist sits close to your neck and finishes with a pretty layered twist detail at the front. It's a tailored, put-together look that pairs beautifully with crew necks, button-ups, blazers, and fall layers.
This style works with all of our rectangle scarf sizes, but our large rectangle scarf adds extra volume for a fuller, more defined twist.
How To Tie A Rectangle Scarf In A Fitted Twist:

Step 1: Gather the scarf
Bunch the fabric together lengthwise, or fold it into a narrow band.

Step 2: Place the middle at the front of your neck
Find the middle of your scarf and place it against the front of your neck.

Step 3: Wrap and bring forward
Wrap each tail around the back of your neck and bring it forward so both tails drape down the front. The scarf should sit close around your neck, fitted but not tight.

Step 4: Tie a half knot
Cross the two tails over each other and tuck one under to tie a half knot, snug against the wrap at the front of your neck.

Step 5: Tuck to create the twist
Take the tail coming out of the top of the half knot and slip it behind the wrap from the top. Gently pull it down and out under the wrap. This creates the layered twist detail with both tails draping down the front.

Step 6: Adjust your way
Leave it as is, or tie another half knot below the twist to secure it and add more dimension.

Finished look
The finished Fitted Twist looks tailored and polished, with a twist detail that adds just the right amount of interest.
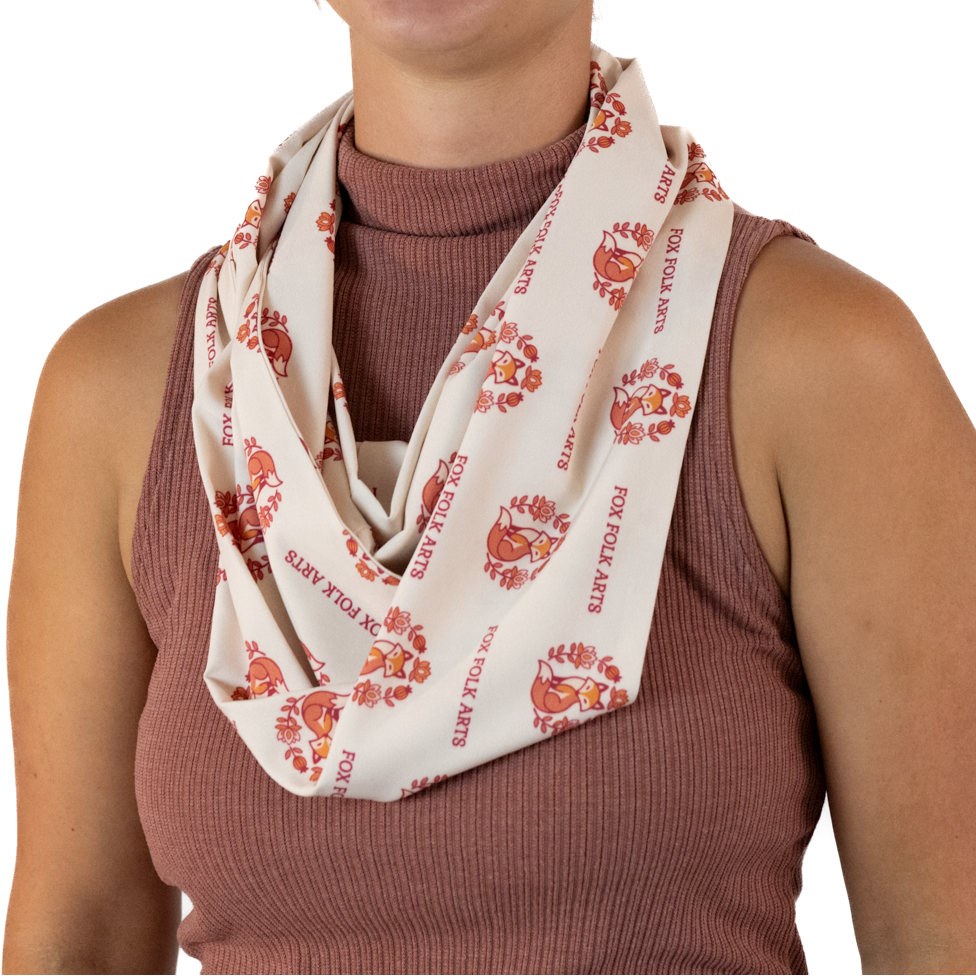
How to Wear an Infinity Scarf
Infinity scarves are sewn into a continuous loop, so the pattern or solid color shows from every angle. They're the easiest of all scarf styles to wear, and great if you aren’t interested in tying fancy knots. An infinity scarf comes ready to wear, with no folding or tying needed. It's a perfect, effortless finishing touch for the weekend or the workplace.
The Knotty Tie Infinity Scarf is 56" x 8.5". We use a high-quality recycled stretch poplin containing 86% recycled polyester and 14% spandex. Our infinity scarves are lightweight, with an elegant silk-like feel and drape.
Every Knotty Tie Infinity Scarf is custom made for you! Upload your own design, logo, or artwork, or work with our in-house graphic designers to create a one-of-a-kind design printed in your exact colors.
The most common ways to wear an infinity scarf are in a single loop or a double loop. For a single loop, simply drape the scarf around your neck like a long fabric necklace for a loose, relaxed look. For a double loop, wrap it around your neck twice. Keep the loops close together for a snug, layered finish, or pull one loop down and away from the other for a softer, cascading style.
However you wear it, an infinity scarf is a safe way to add color, pattern, and polish to any outfit.
Find Your Favorite Way to Wear a Scarf
From a simple Adjustable Knot to a statement-making Scarf Rose, there's a scarf style for every outfit, occasion, and skill level. Start with the beginner styles, then work your way up as you get comfortable. Every tie gets easier with a little practice! Mix and match these looks with our square, rectangle, hair, and infinity scarves to find the styles that feel most like you.
Want a custom scarf that's all your own? Every Knotty Tie scarf can be fully custom designed and printed on demand on our recycled fabric, with no minimums. You can upload your own artwork, or let our in-house graphic designers create a custom pattern for you. Our hair scarves also come in over 700 ready-to-shop patterns, each customizable in the exact colors you want. Whether it's a one-of-a-kind gift, matching scarves for a wedding party, or branded scarves for your organization or team, we make it easy to create a design that's made just for you. Start your custom order today!


